Endless Objects
Home
Fusion 360 and 3D Printed Moulds
For the Endless Objects assignment I made an attempt at repairing the wristband on an old watch by casting a new wristband out of small metal links.
In order to do this I first made measurements of every detail I could think of and then made a point to make note of the critical measurements that would really determine if everything fit or not.
The measurements that were the most important were the width of the band and the sizes of the lugs that connected the band to the watch.
Once I had the measurements I used Fusion to create the 3d models that I wanted to create the moulds out of.
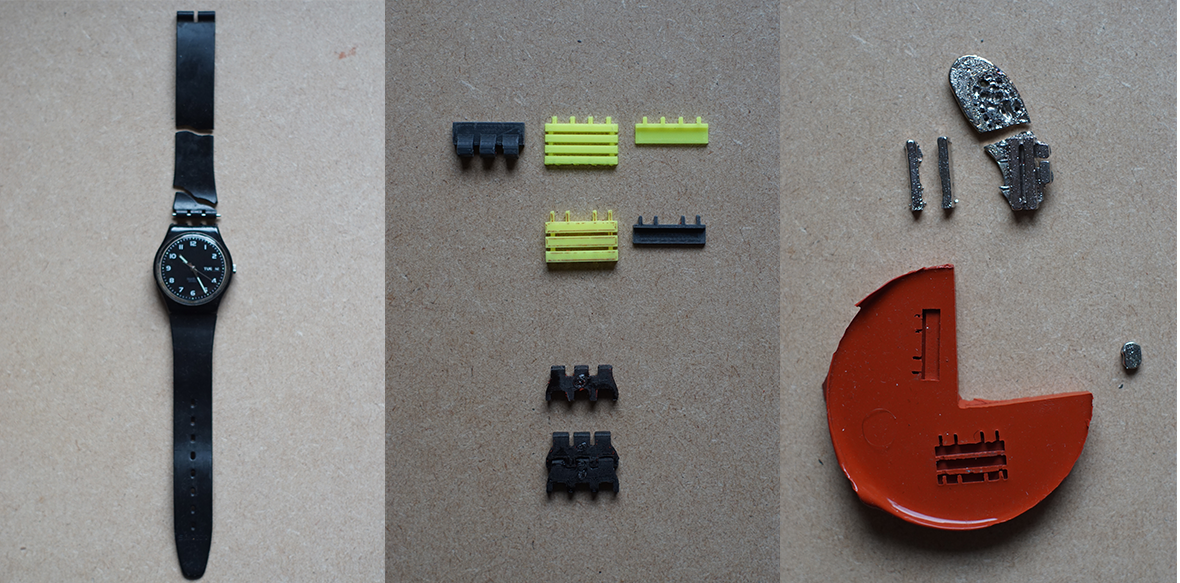
Once I had the 3d models ready I made a 1:1 scale print of the pieces that I wanted to recreate. To the left are the first test print I made along with the final version I decided to continue with.
After creating the first mould and making a couple of casts I quickly noticed that the model I had made both in fusion and for the cast would not work as they were too small and had too many detailed parts.
Knowing this I decided to create a simpler model in Fusion and print these out to create the new moulds out of. Additionally I also included a new feature which would allow me to have a cleaner path through which to pour the molten metal once it was ready to cast.
After printing the new 3d model (now version 3) I was able to create a new mould.This time around I decided to cast the metal into a two piece mould and in a vertical orientation.
These changes turned out to be both an advantage and disadvantage. The two piece mould was a drastic improvement over the simple single piece mould. However the vertical orientation of the mould did present some new issues as it was difficult to get a complete casting of the model.
While it was possible to get usable casts from the second mould I decided to create a new mould that was set horizontally. This turned out to be the right decision as it allowed the metal to flow far easier.
Here I've included some pictures of failed casts I got from the first two moulds. To the left are the results of the first flat mould, the main issue ended up being that the metal would just flow off the mould or pool up into a flat piece that was completely unusable.
To the right are examples of the unsuccessful casts from the second mould, they are nearly usable but as is visible they are all missing one of the four lugs, which was only due to the vertical orientation. This was fixed by making a new horizontal mould.
Once I was able to get the third mould working in such a way that I was able to get consistent results I made a series of casts so that I had about two complete sets of casts. The next challenge was to drill holes in the casts and connect the links with a through pin. This also ended up being the greatest flaw in the project.
I first made several attempts at drilling the holes for the through pin by hand, and while it was possible to make holes in the lugs it was too time consuming and the results were too inconsistent, preventing the through pin holes from lining up.
My solution was to create a drilling jig in which I placed a section of of the links and then I was able to drill through several links all at once.
This only worked partially, while it was significantly better than drilling them by hand it was still an imperfect method as the drill bit would veer out of alignment while drilling. The other issue ended up being that even with the jig and the links supporting each other the pressure from the bit ended up crushing the links in the process.
While I was able to create some sections of somewhat usable links the connections were too brittle to withstand any type of realistic use.
In the end the project ended up being a partial success, if anything it was a valuable experiment. I was aware that Bismuth was a fairly brittle material and I was surprised throughout the process by how strong it actually was after a certain size.
However once the pieces reach a size around under 2mm in thickness in any direction the the piece seems to loose much of the strength it does have. My guess to this is that the grain structure of the metal doesn't allow it to get much smaller and so becomes far more brittle around that size.
But if considering the project aside from the drawbacks of the material I think it was relatively successful in the sense that everything ended up working in one way or another up until the pieces needed to be connected.
If continuing on further I would likely use the bismuth as just a prototyping and reference model material. I find that this is its greatest strength, it allows for rapid prototyping and its easy to work with almost anywhere. Its other value is in being able to create very accurate reference casts from which to make single use sand moulds. However If I were to continue and wanted to create a usable model I would likely use aluminum or bronze and would only use Bismuth as a tool to create moulds.